Do you remember the scene in “Castaway” when Tom Hanks stands on the beach, pounds his chest, and bellows at the ocean: I made fire!
That's how we felt at our house when we made our first maple syrup.
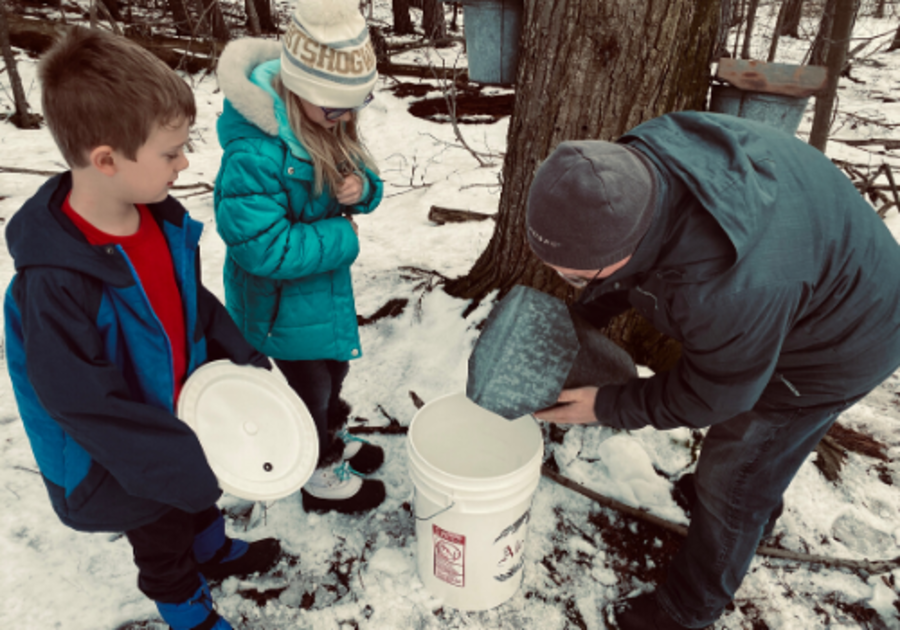
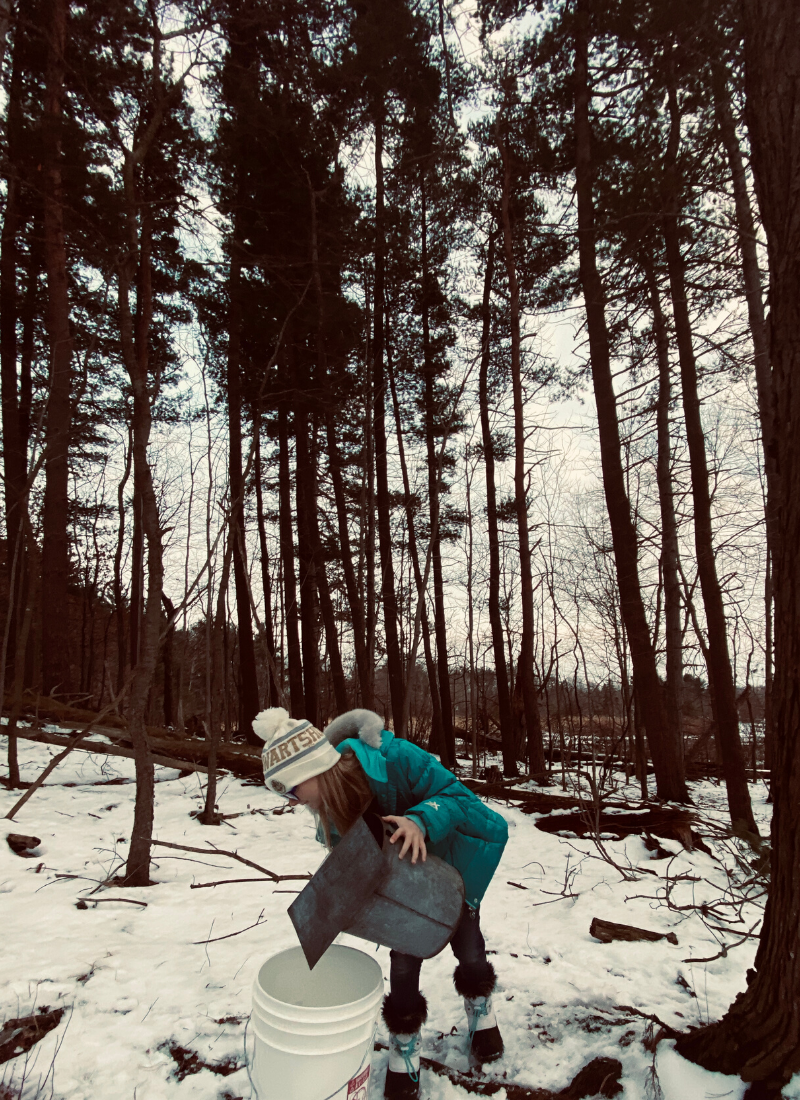
I was excited when I found out we could "rent" sap buckets from Asbury Woods. In my head, we would simply open the tap, and let the delicious syrup fall directly onto a plateful of steaming pancakes.
Turns out it doesn't work that way.
In fact, the sap looks, tastes and has the consistency of water when it comes out of the tree. What the heck were we supposed to do with that?
'Not as scary as it sounds'
I didn't read up on maple syrup production until after we'd retrieved our first four gallons of sap. It didn't take me long to decide we were waaaaay in over our heads. Directions went on for pages. We'd need lots of expensive equipment. We had to do this over an outdoor roaring fire and expect to spend 10-12 hours standing over it. Maybe we should invest in a sugar shack? Just a few thousand dollars for what would amount to a $10 bottle from the grocery store.
Melissa, the program coordinator from the park where we rented the buckets soothed me after I wrote her a panicky email.
"It's not as scary as it sounds," she emailed me back. "Just remember, it's your syrup and if you taste test it and decide it tastes good to you then that's all that matters."
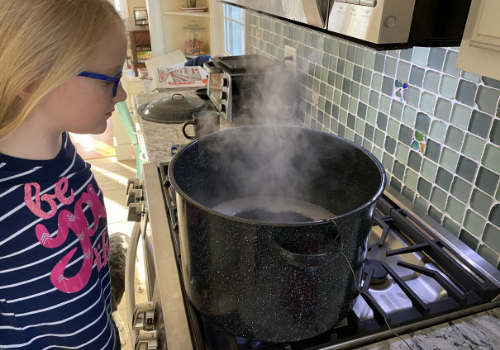
And it turned out she was right. It wasn't as scary or as intensive as the websites I'd read made it out to be. We didn't need the expensive equipment. Our house wasn't ruined by sticky steam. Instead, we produced exactly one cup of perfect golden maple syrup right in our kitchen with our first four gallons of sap.
"This is amazing," my 8-year-old declared, greedily lapping syrup from a spoon I gave him to taste test.
Making syrup in our kitchen
Most of the websites I read said to make syrup outside because the evaporate leaves a sticky film. I don't know if it's because we only had four gallons, or the type of sap we had, but we didn't find that to be a problem. We had our vent on full blast the entire time. We even took the step of covering our white cabinets above the stove and vent with dishtowels in case there was any issue with discoloration or stickiness -- but there wasn't any.
We've made syrup twice again since then and not had any trouble with sticky residue.
Tips for tapping
We are lucky to have Asbury Woods that rents sap buckets. They tapped the trees for us and talked us through the process. We wouldn't have done it without their help!

But you can also tap your own backyard trees during the season, which lasts from February to April, depending on the year and where you live. You can get taps, buckets and other equipment you need at A. Caplan Co. in Waterford and Kraus' Department Store in downtown Erie. It's a very inexpensive hobby, it turns out!
A tip from Melissa: You'll want to store your sap in a cold place -- it can go bad if kept too warm. Store it in a refrigerator, cold garage, or other area that will keep the stored sap below 40 degrees until you're ready to boil.
Here's how we made syrup in our kitchen:
1. Fill your biggest stockpot about halfway full with sap
If you want, you can put it through a cheesecloth or coffee filter to get rid of any dirt or debris. In our bucket, the debris settled at the bottom so we skipped that step.
2. Put the pot on the stove at high heat
You'll leave it at high the whole time. Turn your vent up to full blast. Don't have a good vent? Might want to do this outside!
3. Continue to refill it as the sap evaporates
I refilled the pot three separate times before we'd used our four gallons. This will depend on how much sap you have, how big your pot is and how quickly your sap evaporates.
4. Use a thermometer to keep an eye on the temperature
Most of the other websites I read said to use a candy thermometer. But we just used a meat thermometer that we could keep in the pot and beeped when the liquid reached a set temperature. This made it really easy to know when we were getting close to having syrup.
5. Pour the sap into a smaller saucepan
When you've used all your sap and there's not much left, pour it into a smaller saucepan so the syrup temperature doesn't rise too quickly.
6. Wait...
It took a little more than five hours for our four gallons of sap to evaporate down to syrup. I added more sap to the pot three times until we were out.
7. Jump into action!
Our thermometer showed a steady temperature of 211 degrees (a little under the temperature at which water boils) the whole time we were waiting for the sap to evaporate. But then it started going up quickly. In just 30 minutes or so it went from 211 degrees to 219 degrees -- the temperature at which you have syrup and need to remove it from the stove.
Once you hit that magic temperature, you're done! (If the temp gets much higher, the syrup will crystallize, so it's important to pay attention to that thermometer!)
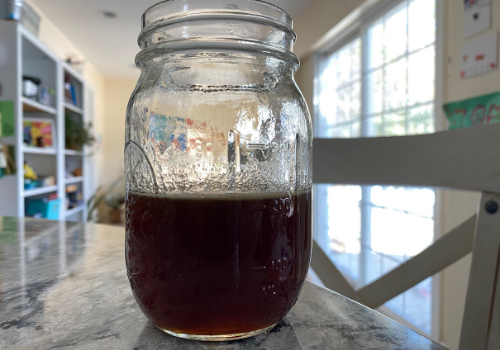
8. Store in a glass jar
We poured our syrup in a Mason jar and couldn't believe how our four gallons of sap had morphed into just 1 cup of perfectly golden and delicious syrup. That first taste off the stove -- amazing!
To paraphrase Tom Hanks: We made syrup!